As your website grows, new needs start to emerge - maybe you want a blog, a shop, or a members-only section. Subdomains are a great way to set these up without having to get a whole new domain. But how do you create a subdomain and access it in cPanel? In this guide, we’ll walk you through the steps so you can get started quickly, even if you’re not a tech expert.
What is a subdomain and how does it work in cPanel?
A subdomain is an extension of your main domain name. It lets you create separate sections of your website that work like independent sites, but still fall under the same main domain. For example, if your main domain is mydorm.com, you can have a blog at blog.mydorm.com or a shop at store.mydorm.com.
cPanel, or any other control panel for that matter, makes it easy to set up and manage subdomains. When you create a subdomain, cPanel automatically creates a separate folder inside your hosting account. Any files you upload to that folder will show up when someone visits the subdomain in a browser.
This segregation (of the folders) makes it possible to use entirely different technologies for your subdomains. For example, you could use a traditional CMS to power your main informational website, while simultaneously using a headless CMS for your blog on a subdomain, and a platform like Shopify for your online store on another.
Why use subdomains?
Here are some common reasons for using subdomains:
- Organize different services: Easily separate distinct services or products that your company offers. For example, support.yourcompany.com can host your customer support portal, and dev.yourcompany.com can host your dev portal.
- Staging environment: Set up a private testing or development environment, such as staging.yourwebsite.com or test.yourwebsite.com. You can then make changes and test them on the subdomain before updating your live website.
- Geographic targeting: Businesses with international reach create subdomains for different countries (such as us.yourwebsite.com or uk.yourwebsite.com) to host region-specific content.
- Specialized content: Host specific types of content that doesn’t fit directly within your main website's structure, like a portfolio (portfolio.yourdomain.com) or a knowledge base (kb.yourdomain.com).
- Mobile versions: Some websites use subdomains like m.example.com for mobile versions.
How to add or create a subdomain in cPanel?
Next, here’s a quick and easy guide on how to add a subdomain in cPanel:
- Go to yourdomain.com/cpanel and enter your username and password.
- Scroll down, look for the “Domains” section, and select it.
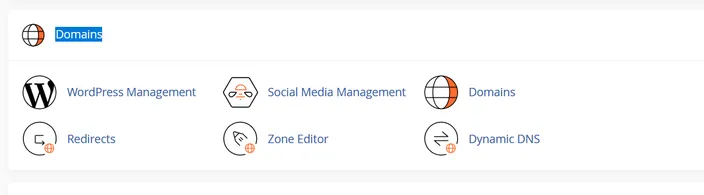
- Click the “Create A New Domain” button.
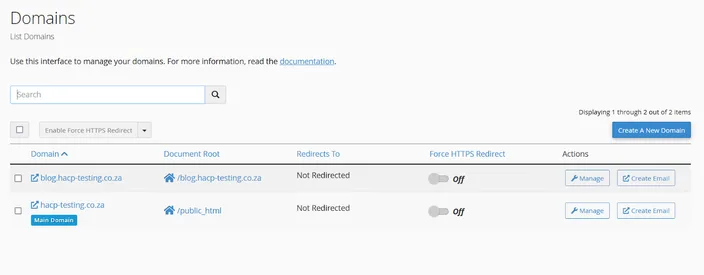
- In the Domain text box, enter your desired name (e.g., store or dev). Make sure the Share document root (/home/username/public_html) with “domain.”. option is not selected as in the following screenshot.
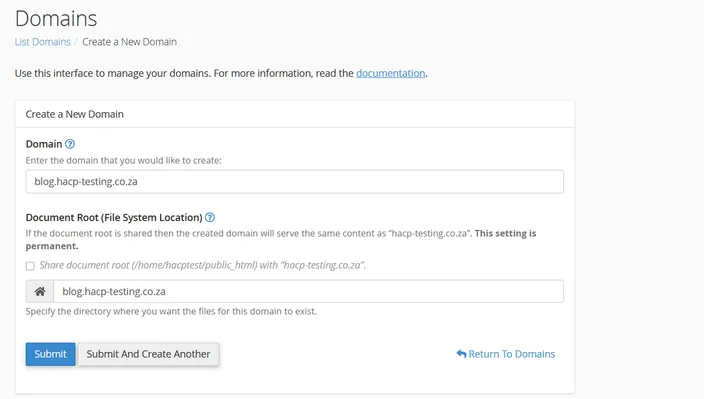
- Enter the relevant directory in the Document Root (File System Location) text box. This is the folder where you’ll add the files for your subdomain. cPanel will likely fill it automatically, but you can change it per your preferences.
- Once done, select the Submit button. This will set up the subdomain and create the new folder for it in the right directory.
At this point, your subdomain address (like blog.example.com) is active, but it won’t show anything until you add files to it. There are two easy ways to do this:
Option 1: Upload files using the file manager
- In cPanel, go back to the main dashboard and open File Manager.
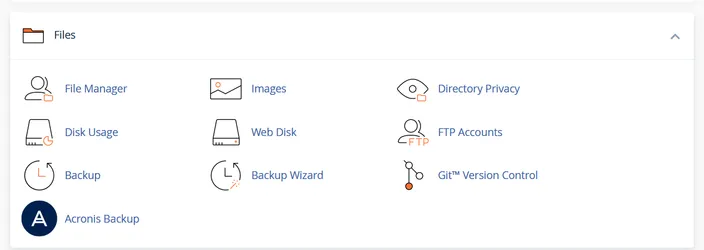
- On the left sidebar, find the folder for your subdomain (e.g., /public_html/blog).
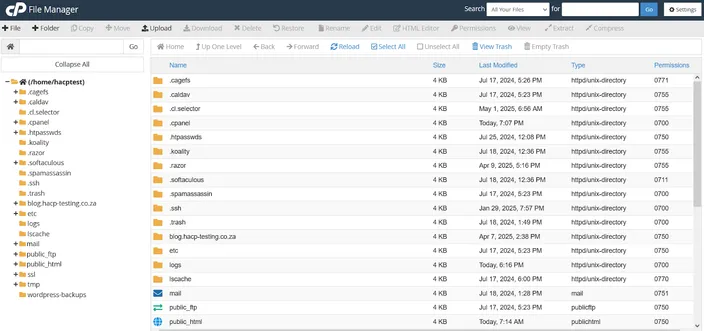
- Select the folder, then hit the Upload button in the top menu.
- Choose the files you want to upload (like an index.html or a complete site).
- Once uploaded, go to your subdomain in a browser to check if it’s working.
Option 2: Install a CMS like WordPress
If you want to use WordPress or another CMS on your subdomain, do this:
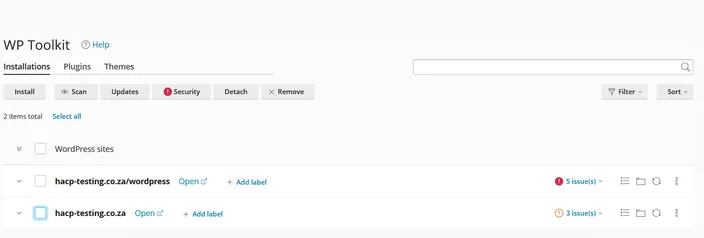
- In cPanel, scroll down to the Softaculous Apps Installer or WordPress Management section.
- Select the relevant subdomain from the list and click Install.
- Fill out the relevant details, including the installation path, title, language, WordPress version, admin login, password, and email.
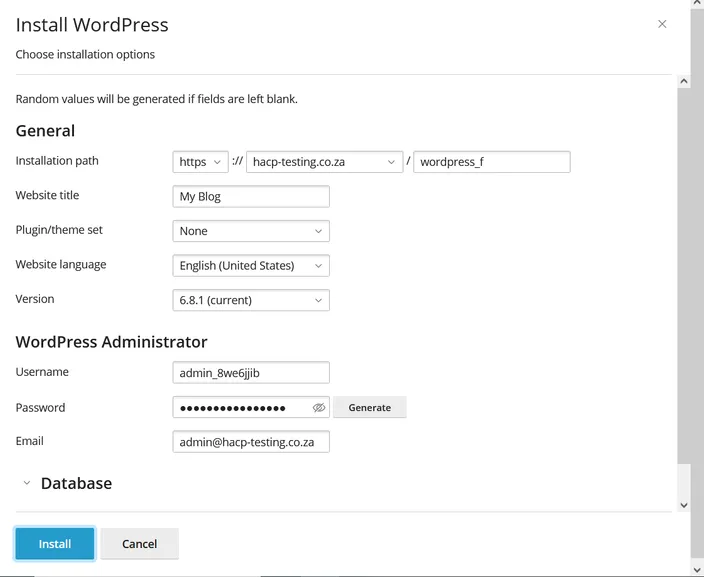
- Click Install.
- Wait for the installation to complete, then visit your subdomain to see the WordPress site.
Troubleshooting subdomain issues in cPanel
Before proceeding further, let’s explore some common subdomain-related issues on cPanel and how to solve them:
Subdomain not loading
- Make sure that the domain is pointed to the right nameservers.
- Give it a few minutes to an hour, as DNS changes can take some time.
- Check that the folder for the subdomain exists and has the relevant files.
“404 not found” error
- Check if you uploaded files to the correct subdomain folder.
- Make sure that the file names are correct (e.g. index.html must be lowercase).
Subdomain shows main website content
- This usually happens if the document root was set to the same folder as the main domain. Edit the subdomain settings in cPanel and assign a unique folder.
SSL certificate issues
- If your site uses HTTPS, make sure that you’ve added the subdomain to your SSL certificate or installed a new one for it.
Too many redirects or browser errors
- Sometimes, outdated browser data can cause redirect loops. Clear your browser's cache and cookies and then retry.
- Check for redirect rules in the .htaccess file inside the subdomain folder.
- Review CMS/application URL and redirect settings.
How to access and manage your subdomain
Once your subdomain is created, here are two main ways to access and manage it:
1. View it in a web browser
Simply type the subdomain address into your browser (e.g., blog.example.com). If you haven’t uploaded any files yet, you will see a default cPanel page or a directory listing.
2. Access it using an FTP client/file manager
If you want to see the directory structure and/or upload/update files, you’d either have to use the File Manager on cPanel or an FTP client. Since we have already covered the steps to access the File Manager, let’s see how you can use an FTP client to manage your subdomain files. For this example, we will use FileZilla, a popular FTP client that’s easy to use. Here are the steps:
- Go to filezilla-project.org and download the FileZilla Client.
- Next, get your FTP login details. You’ll find them in your cPanel account, usually under the Files-> FTP Accounts section. You’ll need the FTP host, username, password, and post (default is typically 21).
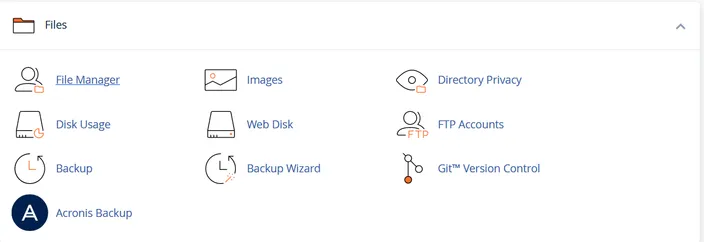
If you don’t already have an FTP account, you can simply create one by specifying a username, password, domain, and directory.
- Enter the login details into the top bar in FileZilla and click Quickconnect.
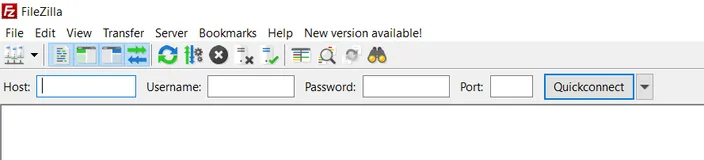
- Once connected, look for the folder that matches your subdomain on the right-hand side (the server side).
- You can now drag and drop files between your computer (left panel) and the subdomain folder (right panel).
How to manually install WordPress on a subdomain?
We already covered how to install WordPress on a subdomain using the auto-installer in cPanel. But what if that option isn’t available? This can happen if you're using an older version of cPanel or your hosting provider doesn’t support Softaculous or similar tools.
In that case, you can install WordPress manually using File Manager. Here’s how:
Step 1: Download WordPress
- Go to the official WordPress website: wordpress.org/download
- Download the latest version. This should save a .zip file on your local computer.
Step 2: Upload the WordPress zip file to your subdomain
- Log in to cPanel and open File Manager.
- Go to the folder for your subdomain (e.g., /public_html/blog).
- Click Upload from the top menu and upload the WordPress .zip file.
- After uploading, right-click the file and choose Extract.
Step 3: Move the files (if needed)
After extraction, WordPress files may be in a folder like /public_html/blog/wordpress. If that’s the case:
- Open the wordpress folder.
- Select all files and click Move. Move them to /public_html/blog.
- You can then delete the empty wordpress folder and the original .zip file.
Step 4: Create a database for WordPress
- In cPanel, go to Manage My Databases and select it.
- Under Create New Database, enter a name (like blog_wp) and click Create Database.
- Scroll down and create a new database user. Set a username and strong password.
- Add the user to the database and give it the necessary privileges.
Step 5: Run the WordPress setup
- In your browser, go to your subdomain (e.g., blog.example.com).
- You’ll see the WordPress setup screen. Choose the right language and select Continue.
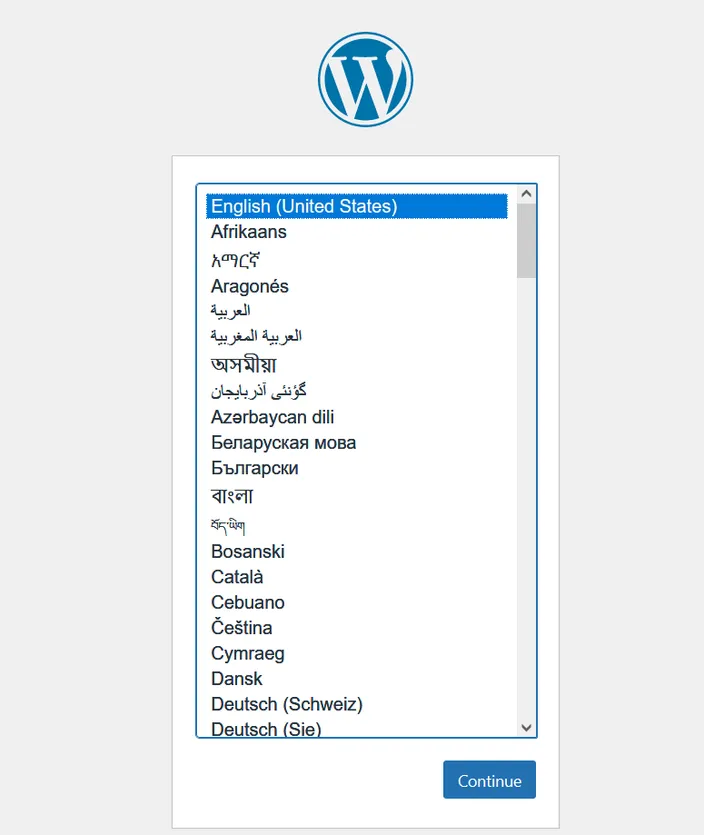
- Click Let’s go.
- Enter the database name, user, and password you created in step 4.
- Submit the form and then click Run the installation.
- Choose a site title, admin username, password, and email. Then, click Install WordPress to initiate the setup.
- Wait till the installation finishes and then access your subdomain from the browser.
Troubleshooting subdomain issues
Sometimes subdomains don’t work as expected even after you set them up correctly. Here are a few other common problems and how you can fix them:
DNS changes not taking effect
Problem: You’ve created a subdomain, but it still doesn’t show up or resolve correctly in the browser.
Solution:
- DNS changes can take up to 24–48 hours to fully propagate. So, if this much time hasn’t passed already, just wait.
- Use tools like dnschecker.org to confirm if the subdomain is resolving globally.
- If DNS still hasn’t updated after 48 hours, check your DNS settings in cPanel’s Zone Editor to make sure that an A or CNAME record exists for the subdomain.
Incorrect document root
Problem: Your subdomain points to the wrong folder or shows unexpected content.
Solution:
- In cPanel, go to Domains > Domains and check the Document Root for the subdomain.
- Make sure that it's pointing to the correct folder (e.g., /public_html/blog).
- If it’s wrong, either update it or recreate the subdomain with the right folder.
Missing index file
Problem: You see a directory listing instead of a webpage.
Solution:
- Make sure that your subdomain folder has an index.html, index.php, or similar file.
Permission issues
Problem: You get a “403 Forbidden” error when trying to access your subdomain.
Solution:
- Check file and folder permissions in File Manager. For most setups:
- Folders should have permission 755.
- Files should have permission 644.
- Also check if there's a .htaccess file that could be blocking access.
Subdomain not created properly
Problem: The subdomain doesn’t appear under cPanel's Domains section.
Solution:
- Check with your hosting provider to confirm subdomain limits or restrictions, especially if you're on a basic hosting plan.
- If you’re not over the limit, try creating the subdomain again by carefully following all the steps. If it still doesn’t show up, contact your hosting provider’s support team for help as it’s probably a technical issue.
Conclusion
As a website owner, you will likely need to create and manage subdomains somewhere along your journey. They allow you to organize your site better, separate different services, and even test new features before publishing them on your main site.
Need reliable hosting with full cPanel access? Check out HostAfrica’s affordable web hosting plans today.
Build and Manage Subdomains in cPanel
Creating a subdomain is a useful way to organise your website, test new projects, or set up separate areas for content. These related guides will help you understand subdomains, use cPanel confidently, install a CMS, and build WordPress websites.
Related articles: